Modesto Cabinet Painters offers a high-impact upgrade without the expense, mess, and disruption of full kitchen replacement. Expert painters refinish or paint existing cabinetry to refresh their look.
A skilled professional uses cabinet-grade paints that hold up to moisture and heat better than regular interior wall paint. These also offer washability, so the kitchen looks pristine and modern.
Versatility
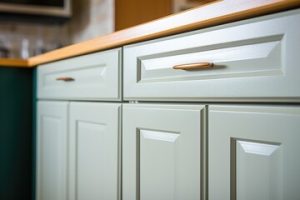
The power of a fresh coat of paint is transformative, shifting the overall ambiance of a room to evoke a sense of renewed vitality and visual appeal. Professional cabinet painting allows for a wide range of color and finish options, enabling homeowners to craft a bespoke aesthetic that aligns with their personal style preferences. The ability to update hardware also opens up the opportunity for a more refined look, further enhancing aesthetics and functionality.
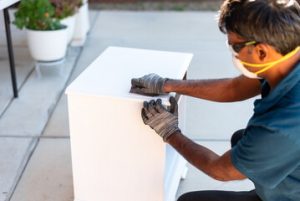
Unlike DIY projects, cabinet painting requires expert application and detailed surface preparation to ensure a flawless outcome. The team of skilled professionals at a local painting company uses specialized tools, proven methods, and durable coatings that resist wear and tear. Using the right primers (bonding or blocking) enhances adhesion and helps achieve true-to-color results, while proper sanding (220-grit paper) roughens the substrate just enough for paint to grip. Professional painters use spray guns for precision on flat surfaces and brushes or foam rollers for corners and edges.
In addition to boosting aesthetics, a refreshed cabinetry project adds value and functionality. Many clients report that a simple color change makes their kitchen feel like a destination again, transforming the space into an inviting and welcoming hub of activity. Refreshing your cabinetry can also tip the scales in a competitive real estate market, as potential buyers are drawn to the meticulous finish and lasting quality that only a professional can provide.
Hiring a professional saves time and money in the long run. Investing in a reputable cabinet painting company sidesteps hidden costs that often accompany DIY projects, such as the cost of specialized tools you only need for one-off jobs or a second trip to the hardware store because your first batch of paint didn’t turn out how you expected. A professional cabinet painting company also eliminates the risk of costly mistakes that can derail the entire project. Those pesky drips and uneven finishes can add up to hundreds of dollars in additional materials, repairs, and touch-ups. The upfront investment in a cabinet refresh is well worth the savings down the road.
Aesthetics
Cabinet painting is a decorative upgrade that changes the look of your kitchen without changing the layout. It delivers a move-in-ready aesthetic without the expense of a complete remodel, delivering strong visual impact and resale value at a fraction of the cost.
A professional cabinet painter uses a process that goes far beyond brush-on coats of wall paint. Surface preparation includes thorough cleaning, de-greasing, and light sanding for optimal adhesion. A bonding primer is used on glossy surfaces, blocking stains and providing a smooth base coat. A durable finish is then applied with a spray application for a factory-like surface that resists chipping, moisture, and wear. The best options feature acrylic urethane or alkyd-based enamel, with low VOC coatings to reduce odors and environmental impact.
The right color choice can make a big difference in the look and feel of your home. A color consultant helps you navigate the many options and select a hue that suits your aesthetic. They offer expert guidance, including how different shades will read in natural and artificial light and how to coordinate with other elements like tile, flooring, and wallpaper. They also help you future-proof your design, ensuring that your new color scheme won’t quickly date or require costly touch-ups.
Whether you’re going for a trendy two-tone design or a classic deep blue or rich earth tone, a high-quality paint job ensures the look will last. Professionally painted cabinets use durable topcoats with UV protection that resist scratching and fading, while regular gentle cleaning and avoiding harsh cleaners prevent common issues like peeling and bubbling. Choosing a satin or semi-gloss sheen enhances durability and cleans easier than matte, while high-gloss finishes reflect light to open up tight spaces.
Adding accent pieces, like crown molding or glass door panels, elevates the finished look and adds visual interest to your kitchen. Updating hardware during a cabinet repaint can amplify the impact of a fresh color scheme. If you’re considering selling your property in the near future, a fresh kitchen can attract more inquiries and offers than a dated or dingy one.
Reliability
Relying on a skilled, experienced cabinet painting company ensures that your project goes smoothly from start to finish. Look for a company with a portfolio of completed projects, a clear mission statement, and customer reviews and testimonials. This shows that the company is dedicated to excellence and has a reputation for quality service.
A reputable cabinet painter will use high-quality products that provide durability, coverage, and stain resistance. These materials are engineered to stand up to the wear and tear of kitchens, bathrooms, and high-traffic areas. They also resist fading and chipping, adding years of value to your home’s cabinets. By choosing a professional, you’ll enjoy results that last longer and save time and money by eliminating the need for costly repainting and maintenance.
When it comes to selecting a color palette, an experienced cabinet painter will consider how light bounces throughout your kitchen and affects the overall aesthetic. They’ll help you select shades that complement your countertops, flooring, backsplash, and other fixtures to create a cohesive and polished aesthetic. They’ll also recommend the right sheen to optimize your cabinets’ performance and reflect natural or artificial light.
Cabinet painters have the expertise to handle complex and unique spaces, navigating corners and crevices with ease. Their experience helps them find creative solutions that enhance your home’s character and personalize your space. They can even rework your existing hardware for a more customized look.
Another key benefit of hiring a professional is that they’ll save you time and money by handling the project more quickly and efficiently than you could on your own. A cabinet repaint will typically be completed in days, compared to weeks for a full replacement. This allows you to get back to your normal routine and reduces living inconvenience.
Hiring a professional is also an investment in the long-term value of your property. A pro’s precision in surface preparation, pristine spray application, and workmanship warranty add up to an outcome that outlasts and outperforms the DIY alternative. It’s worth comparing itemized quotes to ensure you’re getting the best value for your money.
Time-Saving
Cabinet painting is an ideal update for homeowners who want to transform their kitchen without the cost and disruption of a full remodel. It allows for a wide range of aesthetic choices, including modern colors and finishes that align with current trends. It is also more affordable than refacing and less labor-intensive than replacement, saving money on materials, delivery, and installation costs.
When choosing a cabinet painter near me, look for one that prioritizes thorough preparation and quality results. Reliable companies have a dedicated process for cleaning cabinets, sanding, dust control, spray application, and complete reassembly. They use eco-friendly cabinet paint that is low in VOCs for a healthy home environment and long-term durability. They offer detailed estimates and warranties, allowing you to compare options and choose a partner you can trust.
Kitchens are used heavily, and cabinets endure heavy use and exposure to heat, humidity, food spills, and smudges. Choosing the right products is critical for longevity. Professionals know to use durable topcoats that resist chips, stains, and UV damage for a smooth, beautiful finish. They select sanding and mechanical prep methods to create proper adhesion, then apply multiple coats using a fine-finish spray application.
A fresh coat of paint is not only a visual upgrade, but it can boost your mood and the way you feel about the room. Cool blues and greens relax and energize for prepping and dining, while warm yellows and creams make the space more inviting. The right sheen can have a dramatic impact, too: glossy finishes reflect more light for visibility, while matte and satin sheens are easier to maintain.
Targeted upgrades also create measurable returns: swapping cabinet hardware costs $3-$15 per pull, adding under-cabinet LED strips adds functionality for $20-$100, and crown molding accentuates the ceiling for a $100-$400 lift. Targeted refreshes are completed in a few days, creating move-in-ready rooms with minimal cost and inconvenience. This flexibility and affordability makes cabinet painting a smart investment for homeowners.